La restauration de ma Simca 1100 GLS
Page 1 sur 4 • 1, 2, 3, 4 
La restauration de ma Simca 1100 GLS
par deucheman Lun 14 Nov - 18:51
en octobre 2015 j'ai acheté une simca 1100 pour rouler tous les jours. Ce qui devait être une remise en route avec un peu de carrosserie s'est transformée en
Les messages qui suivent sont repris d'un autre forum, les mises à jours suivront.
A l'achat:


J'ai roulé à environ 100km/H de moyenne malgré le chargement. J'étais quand même bien content d'arriver. Pour tout dire j'en avais tellement marre que j'ai posé la 406, le plateau et la 1100 telle quel au local et je suis rentré en vélo
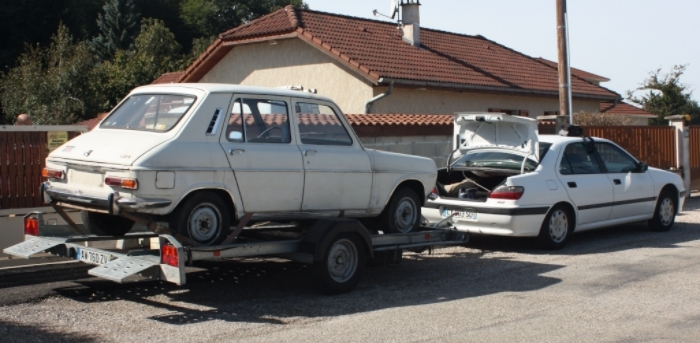

Lavée elle présente bien:

@+
deucheman- Messages : 66
Date d'inscription : 07/11/2016
Localisation : Lorraine, Thionville
Re: La restauration de ma Simca 1100 GLS
par deucheman Lun 14 Nov - 18:53
Les passages de roue arrière sont mangés (ça je le savais)


Le pavillon nécessite un bon planage

Mais c'est après démontage des ailes que je


Arrivé à ce stade j'ai essayé de la vendre mais sans succès

@+
deucheman- Messages : 66
Date d'inscription : 07/11/2016
Localisation : Lorraine, Thionville
Re: La restauration de ma Simca 1100 GLS
par deucheman Lun 14 Nov - 18:54
J'ai commencé par tracer mes zones à découper. Pour le bas de caisse c'est simple: j'ai posé le nouveau dessus et j'ai tracé le contour (par contre je découpe 1cm en moins, j'ajusterais la découpe au moment de la pose).

Puis la meuleuse fait son oeuvre. Côté bas de caisse le renfort de pied arrière et la tôle de doublure sont morts
Je fais un peu de place:
La tôle du bas de caisse intérieur est bien attaquée.
Au dessus du longeron, c'est pas beau:

Vraiment pas beau
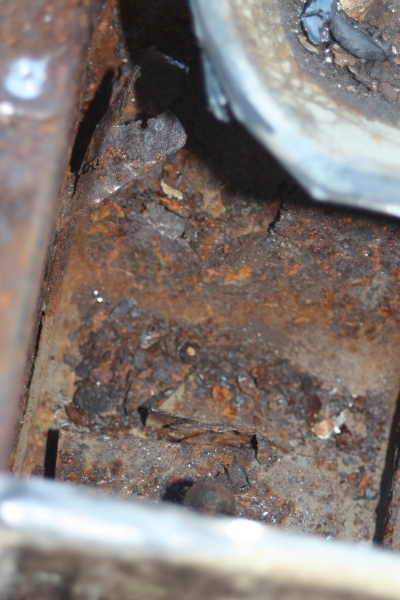
Du coup, après m'être posé la question de la rigidité structurelle, je me suis dit que foutu pour foutu
Et après avoir fini de tout dépointer, sablage
@+
deucheman- Messages : 66
Date d'inscription : 07/11/2016
Localisation : Lorraine, Thionville
Re: La restauration de ma Simca 1100 GLS
par deucheman Lun 14 Nov - 18:55
@+
deucheman- Messages : 66
Date d'inscription : 07/11/2016
Localisation : Lorraine, Thionville
Re: La restauration de ma Simca 1100 GLS
par deucheman Lun 14 Nov - 18:57
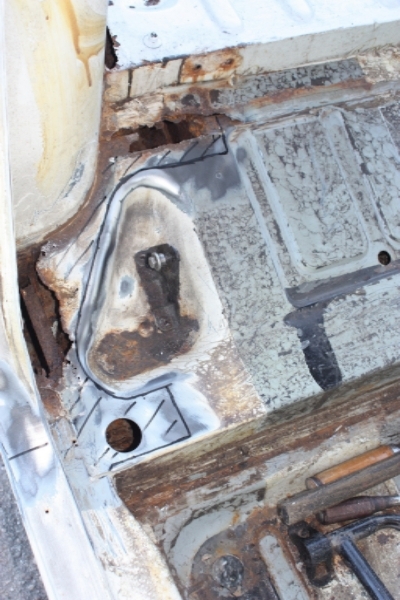
Tout d'abord la réparation du plancher qui reste (encore) à terminer:

Ensuite j'ai refabriqué la tôle qui accueille le boulon de ceinture (içi extrait d'une 2cv

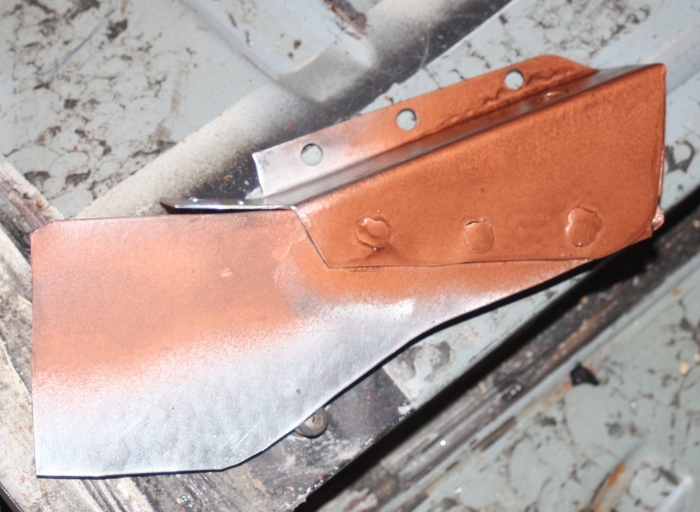
Au passage vous notez que la tôle support de ceinture est déjà soudée sur une tôle... c'est que le tout a être collé pour renforcer l’extrémité du bas de caisse qui est bien croustille

De l'autre côté du bas de caisse interne c'est cette tôle qui sera collée, le bas de caisse sera donc pris en sandwitch

Et enfin le tout sera fermé par une tôle soudée comme à l'origine
@+
deucheman- Messages : 66
Date d'inscription : 07/11/2016
Localisation : Lorraine, Thionville
Re: La restauration de ma Simca 1100 GLS
par deucheman Lun 14 Nov - 18:57
Le support d'attache ceinture a été collé:
Et également soudé par bouchonnage comme à l'origine sur le dessus du bas de caisse interne:

Et la doublure interne a été également collé:

@+
deucheman- Messages : 66
Date d'inscription : 07/11/2016
Localisation : Lorraine, Thionville
Re: La restauration de ma Simca 1100 GLS
par deucheman Lun 14 Nov - 18:58
Au commencement:

Pendant:

ET maintenant:

Un trou de bouché, un! Reste plus que tous les autres :suicide:
@+
deucheman- Messages : 66
Date d'inscription : 07/11/2016
Localisation : Lorraine, Thionville
Re: La restauration de ma Simca 1100 GLS
par deucheman Lun 14 Nov - 19:00
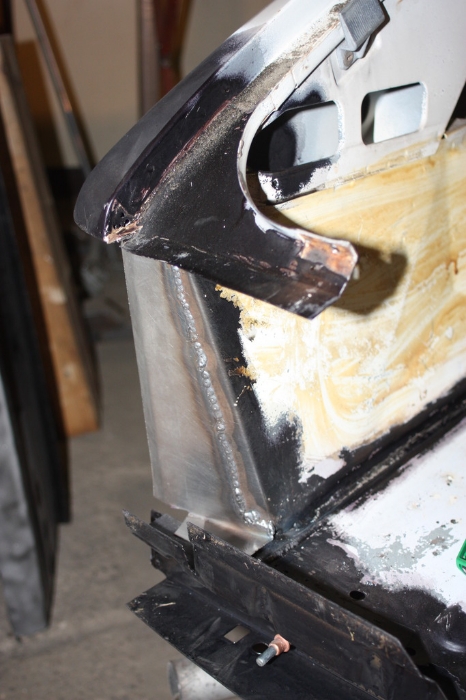
Et puis je me suis dit "quitte à être là, prépare le morceau de remplacement pour l'arche de roue". Vous savez c'est le morceau qui va içi:
Une fois formé, je me suis dit qu'à y être autant couper l'arche de roue et ajuster le morceau.... Et une fois ajusté, je me suis dit "autant y mettre deux ou trois points de mig pour le tenir en place".
Bref, 60cm de bord à bord et c'est réparé


Et puis quelques jours plus tard, malgré pas mal d'occupation liées à la reprise du travail qui m'empèchent d'avancer comme je le voudrais, j'ai tout de même un peu travaillé sur la 1100.
Un ranchiste m'a gentiment prêté une tôle de renfort de pied de porte de rancho , j'ai pu la copier et la souder en place.

Pour mémoire, cette pièce était quasi inexistante sur ma 1100 (il restait les 5cm supérieurs sur 15cm que compte la pièce
Cette pièce était le dernier renfort interne à oser avant la peau extérieure du bas de caisse. J'ai donc enfin pu l'ajuster! Sur la photo il est tenu par des pinces étaux et des clécos, il ne reste plus qu'à décaper les bords d'accostage et souder

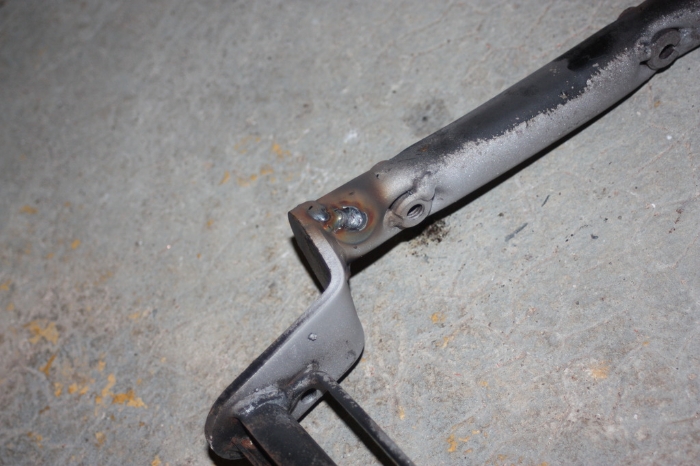
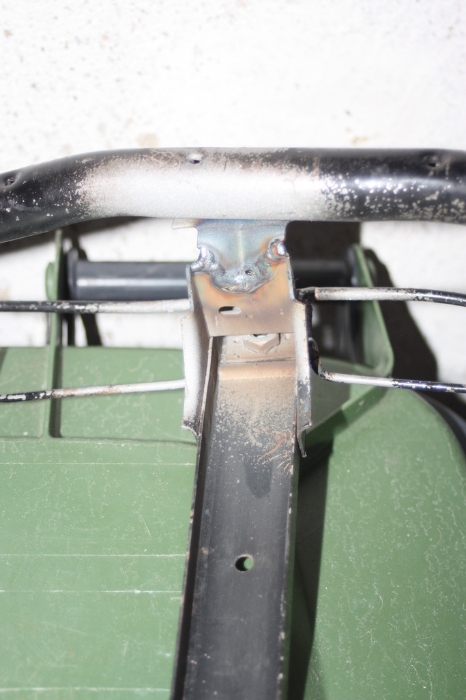
Et j'ai déshabillé le siège conducteur. L'armature était coupée ou fendue en divers endroits, tout est ressoudé
@+
deucheman- Messages : 66
Date d'inscription : 07/11/2016
Localisation : Lorraine, Thionville
Re: La restauration de ma Simca 1100 GLS
par deucheman Lun 14 Nov - 19:01

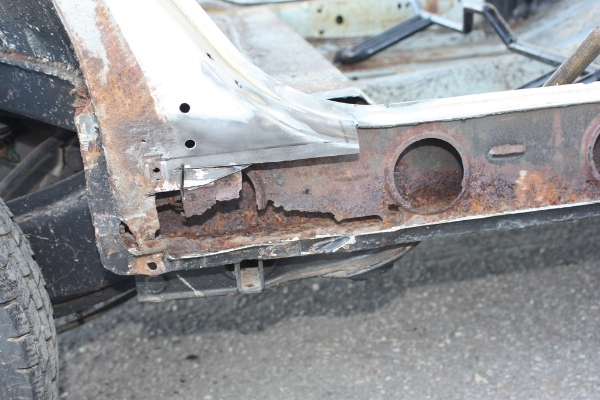
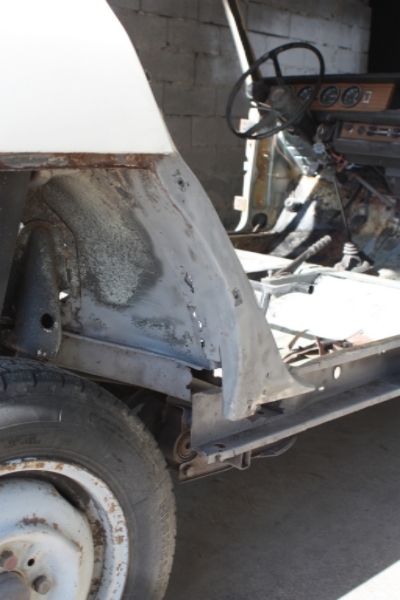
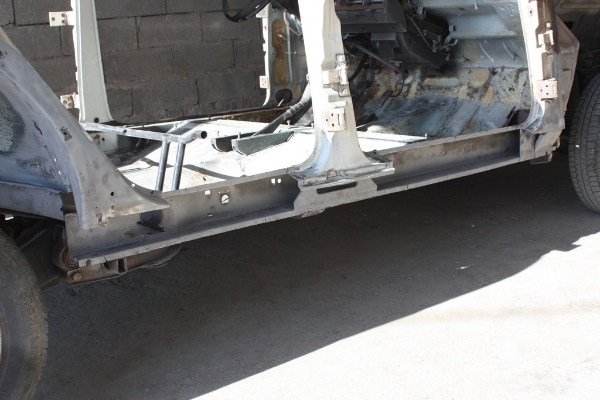
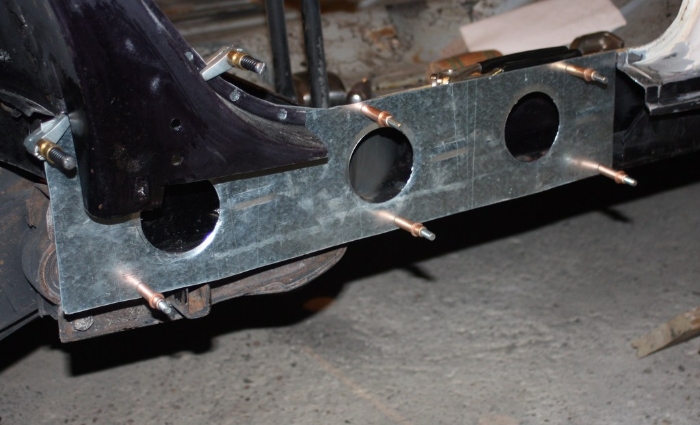
Une belle vue de la traverse, très saine


Au passage j'ai remonté une portière pour vérifier les jeux au niveau du bas de caisse

Et j'ai aussi regardé et mesuré les jeux au niveau de l'aile supérieure arrière:

C'est mesuré en plusieurs endroits:

Et c'est parti pour une amélioration notable de l'angle mort

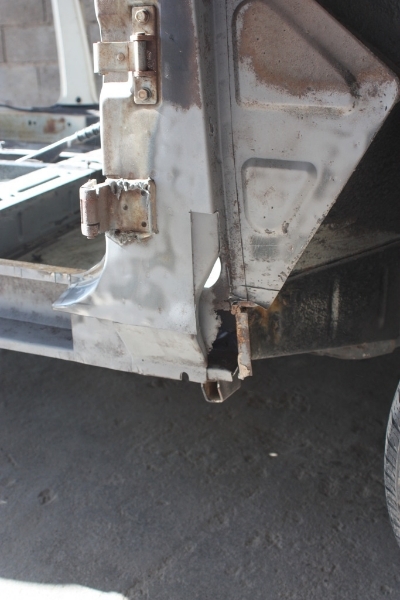
Plus sérieusement c’est bien croqué à l'arrière:

Et à l'avant:

Une vue exclusive de l'arrière d'une aile:

Les trophées de la fin de la journée

@+
deucheman- Messages : 66
Date d'inscription : 07/11/2016
Localisation : Lorraine, Thionville
Re: La restauration de ma Simca 1100 GLS
par deucheman Lun 14 Nov - 19:03
Un état des lieux au départ:


Et un gros tas de pièces neuves qui vont aider à boucher les trous. Elles seront également sablées pour enlever le noir de protection et bien les traiter:

120kg de sable plus tard c'est beaucoup plus net

J'ai anticipé les découpes des pied de hayon pour pouvoir sabler dedans


C'est en effet bien mangé à droite:

Mais aussi à gauche


Une vue de dedans, on voit la lumière au bout du tunnel:

Et c'est aussi mangé devant... bref le côté gauche n'est pas en meilleure santé que le droit alors si je trouve la pièce adéquate je lui fait sa fête!
@+
deucheman- Messages : 66
Date d'inscription : 07/11/2016
Localisation : Lorraine, Thionville
Re: La restauration de ma Simca 1100 GLS
par deucheman Lun 14 Nov - 19:05


Un truc génial pour tracer sur la tôle: les feutres indélébiles pour les transparents de rétroprojecteurs
@+
deucheman- Messages : 66
Date d'inscription : 07/11/2016
Localisation : Lorraine, Thionville
Re: La restauration de ma Simca 1100 GLS
par deucheman Lun 14 Nov - 19:06
Premièrement poser "à noir" la traverse et la face arrière pour aligner correctement les tôles formant le pied de hayon. C'est là qu'on béni l'inventeur des clecos

La traverse est centrée par rapport au plancher arrière:

Et c’est parti pour un patron dans du carton fin mais rigide (ici une vieille pochette cartonnée)

Puis la version métallique en 10/10eme:

Et soudure en bord à bord au point chaînette:

Et après meulage (disque à ébarber puis disque à lamelle)

Si j'ai vraiment du courage je mettrais un peu de mastic
Et j'ai réparé le retour du passage de roue arrière, toujours en bord à bord au point chaînette:
@+
deucheman- Messages : 66
Date d'inscription : 07/11/2016
Localisation : Lorraine, Thionville
Re: La restauration de ma Simca 1100 GLS
par deucheman Lun 14 Nov - 19:07

Et côté passage de roue j'ai un petit trou à reboucher:

@+
deucheman- Messages : 66
Date d'inscription : 07/11/2016
Localisation : Lorraine, Thionville
Re: La restauration de ma Simca 1100 GLS
par deucheman Lun 14 Nov - 19:08

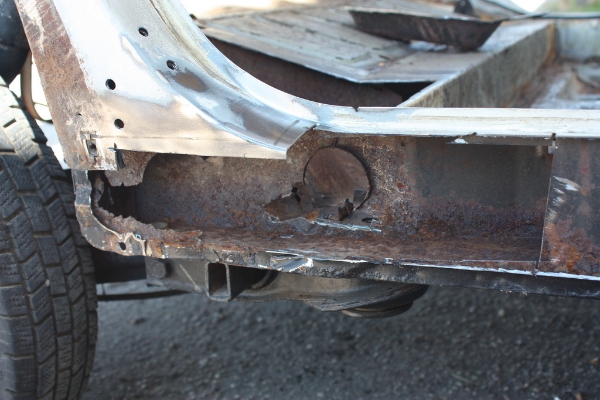
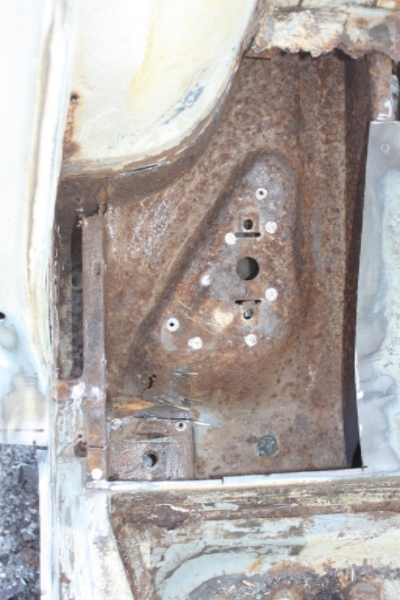
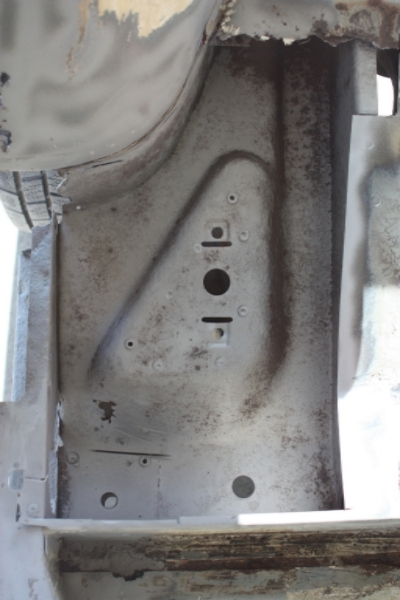
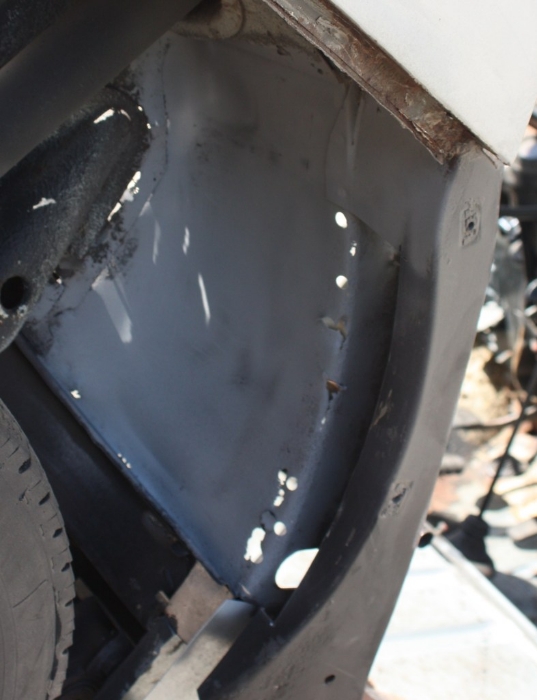
Après sablage:


IL y a un tout petit trou à reprendre sur le flanc du longeron mais comme il est ouvert, ce sera facile
@+
deucheman- Messages : 66
Date d'inscription : 07/11/2016
Localisation : Lorraine, Thionville
Re: La restauration de ma Simca 1100 GLS
par deucheman Lun 14 Nov - 19:09
Le mercredi c'est tôle pourrie
J'ai réparé mon fond de coffre, trois rustines dont une belle au centre pour laquelle il a fallu que je forme l'extrémité de la nervure centrale.

Et ça y'est, ma traverse est enfin soudée

J'ai aussi formé la tôle de fermeture de longeron. Je crois qu'il était nécessaire de la changer :dead:

Et là aussi c'est soudé:

Reste à meuler tous les points et passer à la suite
@+
deucheman- Messages : 66
Date d'inscription : 07/11/2016
Localisation : Lorraine, Thionville
Re: La restauration de ma Simca 1100 GLS
par deucheman Lun 14 Nov - 19:10


Il me reste à finir les soudures. Et le bord tombé le long du longeron est fait

@+
deucheman- Messages : 66
Date d'inscription : 07/11/2016
Localisation : Lorraine, Thionville
Re: La restauration de ma Simca 1100 GLS
par deucheman Lun 14 Nov - 19:10
Le boulot d'hier, le troue dans le longeron est réparé:

Le renfort de fixation de la vis avant de train arrière est fait:


Et la tôle de fermeture du plancher prête. En noir la tôle d'origine, en gris la neuve :

J'ai aussi dégagé la tôle de fermeture du passage de roue:

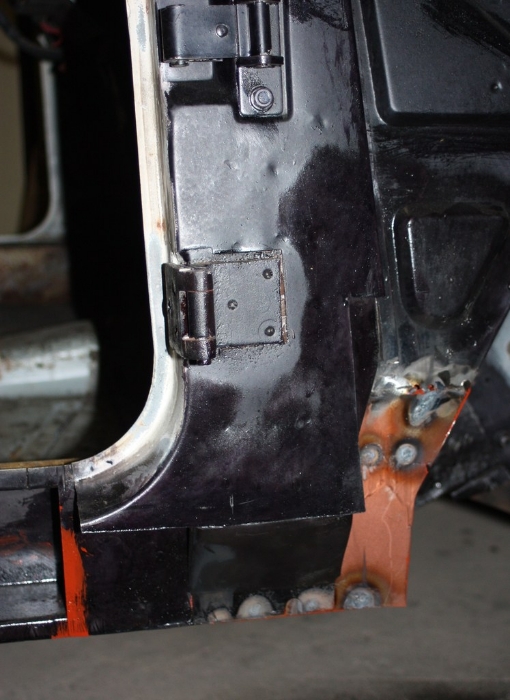
Et réparé le montant de porte:


Et c'est reparti
@+
deucheman- Messages : 66
Date d'inscription : 07/11/2016
Localisation : Lorraine, Thionville
Re: La restauration de ma Simca 1100 GLS
par deucheman Lun 14 Nov - 19:12


Mon aile arrière est bien pourrie, faut que j'en trouve une autre.
@+
deucheman- Messages : 66
Date d'inscription : 07/11/2016
Localisation : Lorraine, Thionville
Re: La restauration de ma Simca 1100 GLS
par deucheman Lun 14 Nov - 19:13
J'ai commencé par former la tôle de fermeture de bas caisse qui fait également la liaison avec le longeron:

J'ai fin d'ajuster la tôle de fermeture du passage de roue. J'adore les clécos :love:

Un peu syntho alu pour finir le pied de porte

Et comme j'en avais fait trop et que je n'aime pas jeter, je l'ai fini sur une des bosses du toit que j'avais auparavant plané :oui: :

Ensuite opération collage de la tôle de fermeture et du renfort de vis de train arrière:


@+
deucheman- Messages : 66
Date d'inscription : 07/11/2016
Localisation : Lorraine, Thionville
Re: La restauration de ma Simca 1100 GLS
par deucheman Lun 14 Nov - 19:14
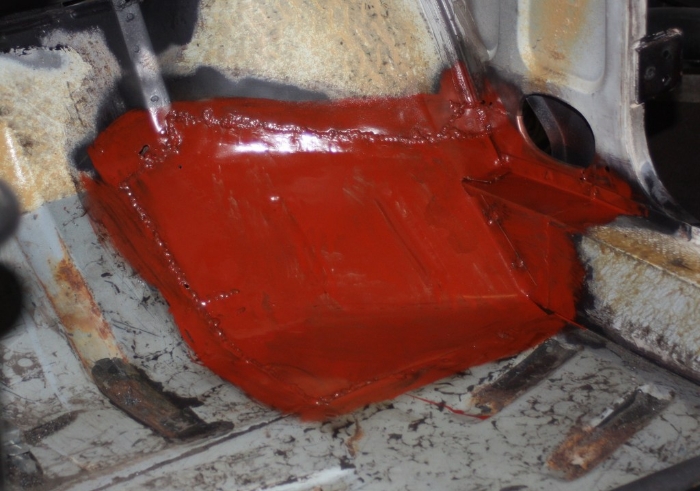
Le passage de roue est presque fini, passé au rustol CIP et le pied de porte en apprêt

Le plancher est pointé, la partie centrale n'est pas soudée mais collée, les barres métalliques permettent de maintenir la pression le temps que la colle soit prise.

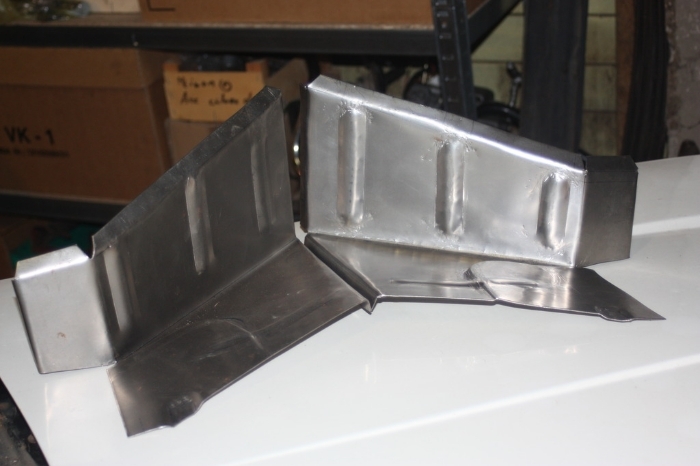
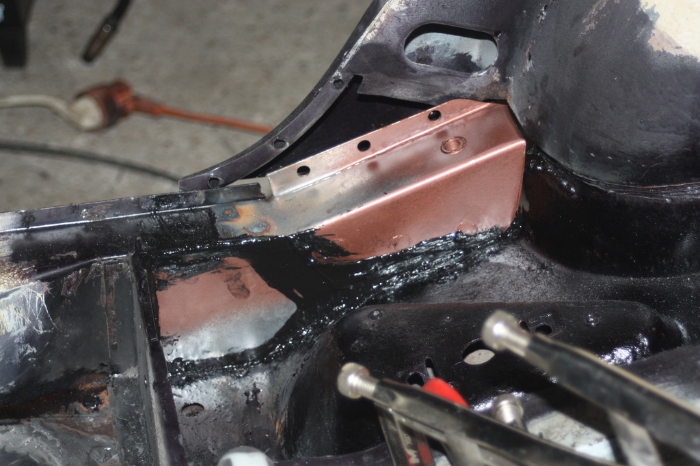
Et j'ai commencé la fabrication du la chapelle d'amorto. D'abord je forme le retour le ong de la chapelle proprement dite:
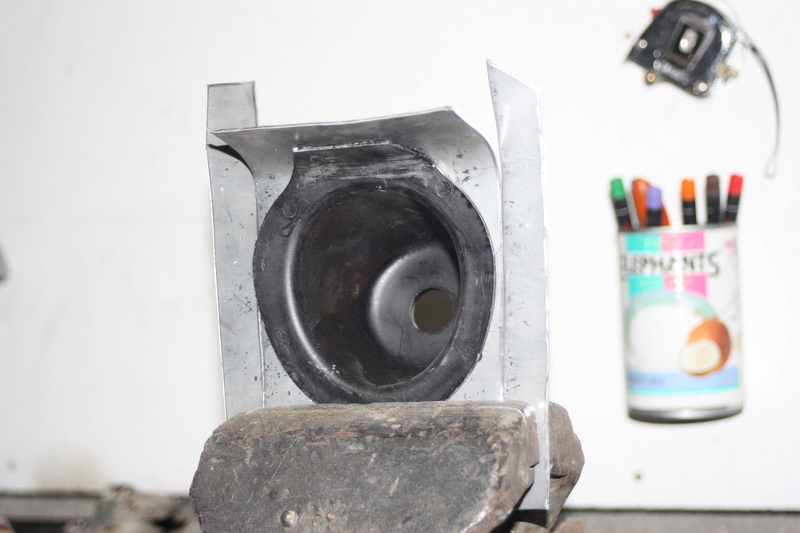

Puis je forme les rebord et je contrôle le galbe à l'aide d'un gabari en carton:

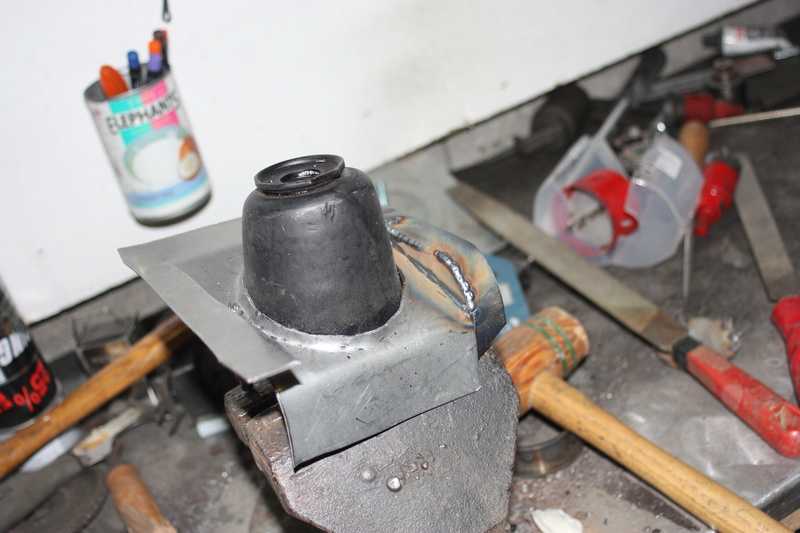
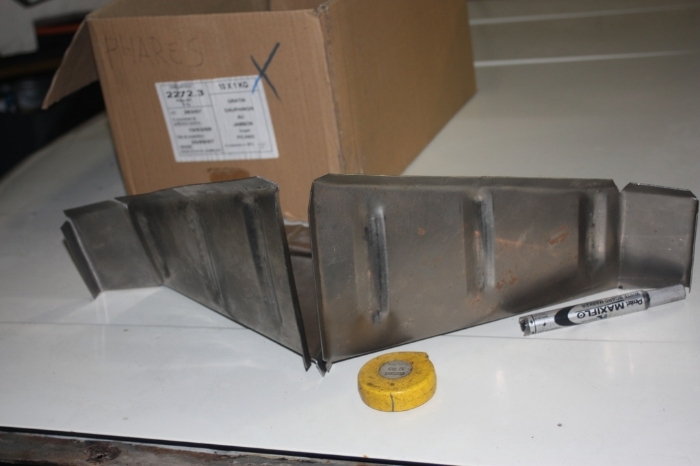
Brut de soudure:

Posé à l'aide de clécos dans le passage de roue:

Et je teste avec l'amorto en place. C'est bon, je peux continuer :oui:

@+
deucheman- Messages : 66
Date d'inscription : 07/11/2016
Localisation : Lorraine, Thionville
Re: La restauration de ma Simca 1100 GLS
par Philippe67 Lun 14 Nov - 20:15
On attend la suite avec impatience.
Philippe67

Philippe67- Messages : 192
Date d'inscription : 06/11/2016
Re: La restauration de ma Simca 1100 GLS
par Invité Lun 14 Nov - 20:20
Faut vraiment aimer les Simca ou être particulièrement maso pour reconstruire un tas de dentelles pareil
Invité- Invité
Re: La restauration de ma Simca 1100 GLS
par Invité Lun 14 Nov - 21:39
Surpris quand même travail sans immobilisation .
Possibilité déformation 'chassis'ou pas ?
Beau sujet
J P
Invité- Invité
Re: La restauration de ma Simca 1100 GLS
par deucheman Mar 15 Nov - 9:56
Philippe67 a écrit:Alors la bravo. 99% des gens censés auraient foutu cette 1100 à la casse. Et lui, il lui redonne vie !!!
On attend la suite avec impatience.
Philippe67
Dalton 57 a écrit:Salut .
Faut vraiment aimer les Simca ou être particulièrement maso pour reconstruire un tas de dentelles pareil
Merci
Et en plus j'adore taper la tôle
 )
)Transfluide72 a écrit:Chapeau.
Surpris quand même travail sans immobilisation .
Possibilité déformation 'chassis'ou pas ?
Beau sujet
J P
Je me suis beaucoup posé la question de la rigidité, j'ai longuement potassé la RTC (je dois la connaitre par cœur maintenant
- le redressage ou changement du longeron avant
- le redressage du longeron arrière
Tout le reste se fait voiture au sol, y compris le changement de la traverse arrière qui relie les deux longerons ou des montants de porte.
J'ai également été prudent en ne coupant qu'un élément à la fois (j'ai attendu d'avoir refait le montant arrière de porte arrière et le pied de hayon pour attaquer le passage de roue) et en ne touchant pas à ce qui fait la structure (c’est pour cela que j'ai privilégié le collage en sandwich de l'arrière du bas de caisse interne plutôt qu'une coupe/soudure qui m'aurait obligé à désolidariser le bas de caisse arrière du longeron arrière).
@+
deucheman- Messages : 66
Date d'inscription : 07/11/2016
Localisation : Lorraine, Thionville

tintin51auto- Messages : 34
Date d'inscription : 10/11/2016
Page 1 sur 4 • 1, 2, 3, 4
» La simca 1100 LS Break de madame
» (La suite) Restauration d'une SIMCA Aronde Grand Large de 1955 surnommée L'Arlésienne ...
» Restauration simca aronde 9
» Restauration d'une Simca Aronde
|
|
|